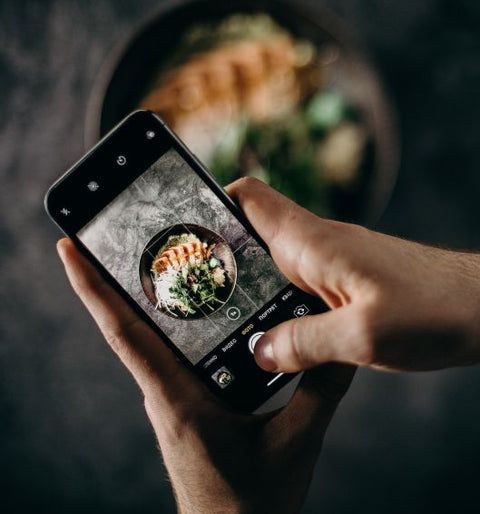
Why is it that some food photography can seem so simple, but look so good? What separates a great food photo from a not-so-great one? Well, a massive part of this lies in the styling of the food (or drinks) and props.
Food and prop styling is a critical part of food photography
You can be a skilled photographer and editor, but if the food, drink or product styling is off, your photographs (that you put so much time and work into) are not going to turn out the way you want. Don’t worry, styling food and props is a lot easier than it seems at first, and this guide is going to show you exactly how to do that to level up your food photography.

Keep this in mind:
When you’re styling for food photography, your goal is to arrange the food and props in a way that tells a story and also makes the food look more delicious, tempting or intriguing. But first, you are going to want to pick a theme or style direction to go in.
There are several core themes of food styling for photography, each with its own unique look and feel. In this guide, we'll take a look at some popular food styling techniques with actionable tips on how you can achieve each one.
Now, if you’re like me, you’ll want to get straight to the useful tips.
Below are 6 wide themes that most food photography can be categorised into.
The food styling categories listed below are a great foundation to use when deciding which direction you should go, they are of course not an exclusive list of every option for styling out there.
Think of them as being the first point to build from when styling each shoot, if you narrow down the category first, it will give you a creative framework to work from.

Using Fenced Creativity:
There is something I like to call ‘fenced creativity’ - sometimes the hardest part in any creative project is knowing where to start, and which direction to follow.
Using fenced creativity gives you a direction to go in, rather than having every possible option wide open, you have a specific goal to achieve, or problem to solve. This can be the best catalyst for great ideas to be born.
You might already have a certain theme or look in mind, and you might not. Either way, if you ask yourself the following questions before putting together any set, it will make it so much easier to stay on track:
- What are the core ingredients?
- What does this food or drink mainly provide? Eg: is it more nourishing, refreshing, indulging, warming.. etc.
- What types of feelings do they evoke?
- What scenario can you imagine would be best for enjoying this drink or food? Eg on the beach, in a cafe, a high-end restaurant, at home…
- What sort of message does the food or drink suggest? Eg: simple and staple, sophisticated, extravagant, fun, etc.
Layer Your Food, Props & Details
With any photography set, and especially for food photography, you want to layer in all of the elements, start with the food or drink itself, then the primary and secondary props, and then finish with adding the final details. It also never hurts to take some photos after each layer is added, this can be especially useful if you want to have a series of photos to use, again this helps to tell a more detailed story with your food photography.
The 6 main “types” of styling in food photography:

1. Natural Style:
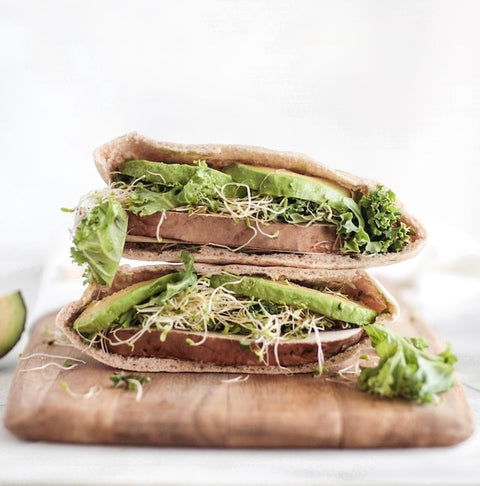
The natural style often embodies a warm and homey look; this can follow a few different directions (rustic, Nordic, wild/lush…), but all are achieved by using natural elements such as wood, stone, greenery, and natural textures such as linen and wool.
For natural styling, present your food or drink in a way that looks as if it has just been prepared and served mere moments before, make sure to use minimal manipulation and no artificial props.
This style is perfect for dishes that are homemade, hearty, and comforting; It’s also ideal for any foods and drinks that are healthy or when you want to enhance certain natural ingredients. Examples include smoothies, salads, stews, vegan, keto or vegetarian dishes, and even desserts such as fruit tarts, pies and sorbets.
A key part of styling for a natural food photo is to use natural props and decorations, such as wooden boards and platters, stone or earthenware dishes and linen napkins. Avoid using artificial props or overly arranged dishes. Keep the food looking simple, casual, and effortless to allow the food and its natural elements of it to shine in pure unadulterated glory.

2. Minimalistic:
The minimalistic style, as the name suggests, is a clean, simple and modern look. It can also work great if you are going for a more Nordic/Scandi feel in your food photography. Syling for minimalistic food photography is arguably one of the easiest and cheapest ways to go when styling food because you will be using both a limited number of props and a neutral colour palette.
The focus is on the food or drink itself and showing off its natural beauty. This style is perfect for dishes that are more simple, elegant or refined.
Examples include soups, simple cakes and cocktails. Minimalism can also be used to balance out more colourful or extravagant dishes.
To nail the minimalistic style, use a neutral colour palette of white, grey, tans or black. You don’t want the background or props to take away from the main event, which is of course the food, drinks or products.
Use simple props such as glass, wood, metal and white pieces, trying not to use many secondary decorations (garnishes, grains/flour dusting, etc). The most important thing to remember is to keep the composition clean and uncluttered and avoid using too many props, details, colours or textures.

3. Gourmet/Luxury Style:
Styling for gourmet or luxury food, it's important to aim for an upscale, sophisticated look. You may want to show opulence, indulgence or complexity in a spread like this, which is perfect for dishes that are extravagant and luxurious.
Examples like high-end main courses, seafood, gourmet sandwhiches, cakes and other desserts. Typically you want to be using more high-end props such as silverware, crystal, hardwoods with rich colouration, silk or even fine china if you have some to hand.
For a gourmet or luxury look, the food should be presented in an artful and elaborate way, with attention to detail and presentation.
Pay extra attention to elements such as which is the best orientation of the food and backdrop you use, try to also use colour tones that are rich and opulent.
4. Lifestyle:
Lifestyle food photography is quite broad, you can go for the everyday casual and relaxed look, or lean towards the more aspirational influencer end. You can even use props that are part of everyday life such as books, magazines, and takeaway coffee cups, for example.
For lifestyle, the food is styled in a way that looks as if it is being enjoyed in a natural setting, feeling as if not too much effort has gone into arranging it (even if it has), and looks as if it's about to be consumed right at that moment.
Lifestyle is perfect for dishes that are casual and easy to make, or perhaps eaten in a more on-the-go setting... (burgers, pizza, smoothies, coffees, burritos..) but it can also be applied to more sit-down at a table setting, like in the example photo above. Again, it depends on the story you’re trying to tell with your food photography.

5. Pop-Art Style:
Pop-art style food photography is exactly what you would imagine when you think of all things pop-art - bright colours, cartoonish shapes and textures. Try to have a very definite placement for all props and everything within the composition.
This works great for foods and drinks that are fun, and usually less savoury, like donuts, cakes, sweets/candy, drinks and popcorn, etc. You wouldn't usually want to see a bowl of tagliatelle in a pop art setting (in general) as the two don’t exactly mesh together well…
Styling for pop-art food photography is a little different to the others...
You'll want to place your subject and props in very definite positions within your composition - focus less on making it look like it’s ready to be eaten at that very moment and more on everything having its own perfect position in the frame.
(E.g. rather than placing a fork in a slice of cake as if it’s about to be eaten, place the fork in a more aesthetic or artful way - such as in a horizontal line above the plate or at a different height, or maybe even suspended in the air.
You can also play with the scale of things, and make something look giant by placing a miniature prop nearby for example, this will all help to add to the sense of surrealism or exaggeration that pop art lives in.

6. Dark & Moody:
You’ve definitely seen this one before and it’s probably one of the most popular styles for food photography, particularly on social media. Dark and moody food photos often use a lot of texture while playing with shadow and light. You’ll also usually need to use rich dark colours and more detail.
Adding details like salt grains, flour or herbs can really bring a dark and moody food spread to a whole new level. You can also show the process of making the food or drink - the mess that created the finished piece.
Think of a bakery and the different elements that are used to make bread - the mixing of the ingredients, the fire or heat of the oven to heat it up; or the storm and flurry of mixing a smoothie, soup or cake batter, etc.

Your dark and moody food spread doesn’t have to show the process or have lots of different components, but what you should almost always do for dark and moody shoots is to block off most angles of light entering the frame and only allow light to come from one main direction or source.
You can of course use a key light to highlight the subject a bit too if needed, but the fewer directions you have light coming from, the better.
Use shadows and textures to create mystery and intrigue, something that draws the viewer in to see what might be hiding in the details. This style is perfect for almost any type of food or drink.
Again, a wide range of props can be used for dark and moody food styling, but using earthy tones and materials with a few small elements of colour will work great together to add detail and richness to your photos.

Use Versatile Props
Choosing the right props for styling will depend on your own circumstances and what kind of food photography you will be shooting. Saying that - the best type of props to have in your collection are ones that can be used across many different themes, shoots and styles.
These will ultimately be the props that you use most often and will help you to capitalise on your own unique style.
Examples of versatile props might even be a set of backdrops that don’t draw too much attention away from the subject matter and are a nice neutral palette to frame a range of different styles.

This is why we love wood as a material as it's very versatile when it comes to styling a variety of foods and drinks, it can fit in just as well in a minimalist or lifestyle spread as it can in a natural or luxury one.
Adding a wooden spoon, bowl, cup, board, etc. to a shoot can help to shape the entire scenario or story that you are telling with your photography; it can elevate even a simple setting to a more refined level.
The same versatility can be said for materials like slate, glass and even some ceramic or pottery pieces, as long as the colour and patterns are not too loud.

Other factors to bear in mind:
Remember that a large part of great food and drink photography is down to the arranging and styling of the subject and props - the other part can be broken down into a few other factors that you can take advantage of, such as:
- Lighting and perspective
- Textures, details and garnishes
- Touch-ups and edits in post
As this guide is dedicated to sharing tips for styling your food, drinks and props, we aren't going to delve into each of the above topics as they are all worth their own detailed guide. Saying that, we'd recommend reading up a little more on these topics too.

The Lesson:
While placement and styling are very important aspects of food photography, by understanding the different themes used in food photography, you can create exciting photos that tell a story as well as make your food look twice as delicious and tempting.
Remember to pay attention to the details, use the right props, and experiment with everything you learn, be it through instruction or experience.
Most importantly, when styling food or drinks for food photography, the first step is to look at the food or drink that you are shooting and ask yourself the questions we mentioned earlier to help you decide which theme and direction to go with:
- What are the core ingredients in this dish or drink?
- What does this food or drink provide? Eg: is it particularly nourishing, refreshing, indulging, warming...etc.
- What types of feelings do they evoke?
- What scenario can you imagine would be best for enjoying this drink or food the most?
- What sort of message does the food or drink suggest? Eg: simple and staple, sophisticated, extravagant, fun, etc.

All of this will come together and form an entire story that you are telling with your photo, afterall, all photography is storytelling.
An extra useful tip is to jot down a few adjectives that you associate with your subject matter before you decide on what props and style to use, this will give you a nice definite fence to let your creativity grow within!

That's not all:
If you enjoyed this short guide, you should definitely check out our other guides here:
Check out our growing range of wooden pieces ideal for food photography here.


Comments (0)
There are no comments for this article. Be the first one to leave a message!