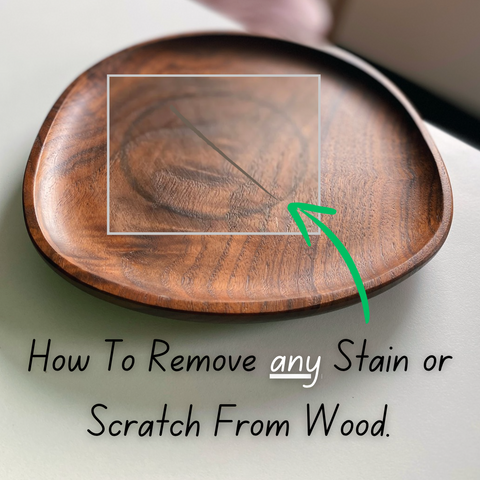

Getting stains or scratches on wood can be very annoying and potentially ruin the entire piece, depending on how bad the scratch or stain is.
But, wood is an incredible natural material with the capability to practically heal itself, with a little help from this guide.
Here is a list of *almost* every way you can remove any kind of stains or scratches from wood at home, be it wooden kitchenware, furniture, or flooring.
Feel free to navigate directly to the section that most fits your predicament using the table of contents below!

Contents:
1: How to Remove Water Stains from Wood
2: How to Remove Oil or Grease Stains from Wood
3: How to Remove Old or Persistent Stains from Wood
4: How to Remove Heat Stains & Burns from Wood
5: How to Remove Sunlight Stains or Light-Bleaching from Wood
6: How to Remove Scratches, Cracks, Dents & Scuffs On Wood
7: How to Remove Bends or Warps from Wood
8: How to Sand & Repair a Stain or Scratch in Wood
9: Tips for Avoiding Future Stains, Scratches, Cracks & Warps on Wood
1. How to Remove Water Stains From Wood:
Method 1: Use a hairdryer and cloth:
For light water stains, you can use a hairdryer on a low setting to gently heat the stained area. This will cause the water in the wood stain to evaporate. You will want to periodically wipe the wood with a soft cloth to absorb the moisture and the stain. Note: This works best on fresher stains less than a few hours old.
Method 2: Make a baking soda paste:
Another great way of removing stains from wood is to make a paste with ordinary baking soda and a small amount of water. Mix the two ingredients until it forms a toothpaste-like consistency.
Apply your baking soda paste to the water stain and gently rub it into the wood using a soft cloth. Let it sit for a few minutes, then wipe it off with a clean, damp cloth. This method will help remove light water stains from the wood that are too old or stubborn for the hairdryer method.
Method 3: Vinegar & olive oil/vegetable oil:
For this one you will need to mix equal parts white vinegar and olive oil in a bowl. Then dip a soft cloth into the mixture and gently rub it onto the water stain in circular motions. Let it sit for a few hours, or overnight, and wipe off the residue with a clean cloth.
How does this work? The vinegar helps to lift and remove the stain while the olive oil will re-seal the area of wood. This method also works great for older food stains! I recently used this method to remove a dark tomato sauce stain from one of my cutting boards, worked a treat.

Method 4: Toothpaste:
Using non-gel toothpaste can also be used to remove minor water stains from your wood kitchenware, furniture or flooring. Apply a small amount of toothpaste to the stained area, then gently rub it in using a cloth.
After about 10 minutes you can wipe away the toothpaste with a damp cloth. This method can work well for less severe or lighter stains, but for darker and more persistent wood stains you may have better luck using one of the other methods.
Method 5: Lemon & salt:
Mixing lemon juice with a pinch of salt to create a natural abrasive cleaner can be a great at-home 'recipe' for removing water stains or food stains from wood. Make sure that you add more salt than lemon juice, so that not all the salt is dissolved.
Apply the mixture to the water-stained wood and gently scrub the area with a soft cloth, being careful to follow the direction of the grain so not to scratch softer types of wood. The acidity of the lemon helps lift the stain and the salt acts as a mild abrasive to scrub at the surface. Afterwards, wipe off the mixture with a clean, damp cloth.
Method 6: Mayonnaise or petroleum jelly:
Apply a small amount of mayonnaise (yes, really, mayonnaise!) or petroleum jelly (such as vaseline) to the water stain. Let it sit for several hours or overnight. The next day, you can wipe off the residue with a clean, damp cloth. These two substances will help moisturise the wood and can even lift minor water stains.
Method 7: Commercial wood stain remover:
If the water stain persists, and none of these methods have worked, you might need to consider using a commercial wood stain remover and follow the manufacturer's instructions. Or, there is one other option: Sanding the area and resealing it. Scroll down to section 8 for a quick but comprehensive step-by-step for sanding and repairing a stained/scratched area of wood.
Tried everything and it still isn't working? a last resort: sand the area and re-seal.
If none of these methods above worked, or you just want to guarantee 100% of the stain is removed first time, sanding and resealing the stained or scratched area of wood might just be the best fix for you.
To some It might sound like a daunting job at first, but sanding and repairing a stain or minor scratch can be easily done in under 15 minutes, so long as the stain is not too big or in a difficult to access area.
See the full step by step how-to for sanding and repairing wood in section 8 below.

How to Remove Food, Oil or Grease Stains from Wood:
To remove food or oil stains from wood without sanding, you can use various natural methods. Here are some effective techniques:
Method 1: Dish Soap and Warm Water:
It may sound obvious, and you might have already tried this, but using a dollop of dish soap or (washing up liquid as we call it in Ireland) with a little water and scrubbing it can remove the majority of food or oil stains if they are relatively fresh.
Method 2: Cornstarch or Talcum Powder:
Using ingredients you likely already have at home is always satisfying when it works. Try sprinkling cornstarch or talcom powder on the stained wood, let it sit for several hours or overnight and it should absorb most of the stain or oil. You can also try using the lemon and salt method (above) afterwards if the stain is not fully removed.
Method 3: Baking Soda Paste:
Mix baking soda with water to create a paste similar to above, here's a recap:
- Mix baking soda with water to a paste and apply the paste to the stained area and gently rub it in with a soft cloth.
- Let it sit for a few minutes, then wipe it off with a damp cloth.
- Repeat as necessary until the stain fades.
Method 4: Vinegar and Water Solution:
- Mix equal parts white vinegar and water in a spray bottle.
- Spray the solution onto the stained area of wood and let it sit for a few minutes.
- Wipe off the solution with a clean, damp cloth.
- Vinegar helps break down grease and oil stains effectively.
Method 5: Lemon Juice and Salt:
- Sprinkle salt over the stained area of wood.
- Squeeze lemon juice onto the salt, trust the process.
- Use the rind of the lemon or a soft cloth to gently rub the mixture into the stain.
- Let it sit for a few minutes, then wipe it off with a damp cloth.
Method 6: Hydrogen Peroxide:
- Apply a small amount of hydrogen peroxide directly to the stained area.
- Let it sit for a few minutes, nothing more than 5-10 minutes.
- Wipe off the hydrogen peroxide with a clean, damp cloth.
- Repeat if necessary until the stain disappears.
Method 7: Commercial Wood Cleaners or Sanding:
Again, if none of these methods are working for you and the stain is too persistent, you may have to go with something a little more... industrial, like a commercial wood cleaner/stain remover. Or - of course, there is always sanding and repairing as an option (skip to section 8 for a step-by-step for sanding & repairing).
As always, test any method on a small, inconspicuous area of the wood first to make sure it doesn't cause more damage or make the stain worse! After removing the stain, if you have removed some of the wood sealant, it's best to reseal the area with some wood sealant.

3. How to Remove Old or Persistent Stains from Wood:
For older and stubborn stains on wood, you might need to use more intensive methods to be able to fully get rid of the stain. Here are some extra techniques that can help clean older stains on wood:
Method 1: Vinegar & Olive/Vegetable Oil:
If you have not already, try this method before anything else, it just might well save you some time and money if you already have these ingredients to hand. Mix equal parts white vinegar and olive oil, they will naturally not mix well, but as best as you can. Then rub the oil and vinegar mix into the wood with a cloth and let it sit overnight. Wash off anything left in the morning and it should have removed the stain.
Method 2: Oxygenated Bleach:
- Mix oxygenated bleach with warm water as per the label instructions.
- Apply your bleach to the stained area using a sponge or cloth.
- Let it sit for 15-20 minutes, then scrub the area gently with a soft brush.
- Always rinse the wood thoroughly with clean water and dry it completely after using any chemicals like bleach, especially if the wooden item is a kitchenware product that will come in contact with food.
Method 3: Mineral Spirits / White Spirits:
- Gently dab the stained area of wood with a drop of mineral spirits on a cloth, working in small circular motions.
- Continue this until you see the stain starts to lift from the wood.
- Wipe off the mineral spirits with a clean, dry cloth and wash before use.
Method 4: Wood Bleaching:
- Use a bleach specifically designed to lighten or remove stains from wood.
- Follow the label's instructions carefully.
- Test the wood-bleach on a small, hidden area of the wood first.
Method 5: Sand & Refinish:
- If the stain is deeply embedded and cannot be removed with cleaning methods, you may need to sand the affected area.
- Use fine-grit sandpaper to gently sand the stained area until the stain is removed.
- Clean the wood thoroughly to remove sanding dust.
- Apply a fresh coat of wood stain or finish to restore the wood's appearance.
When dealing with older stains, patience and persistence are key, and maybe some elbow-grease!

4. How to Remove Heat Stains From Wood:
Heat stains or worse - burns, on wood can be tricky to fully get rid of. There are still some methods you can try to remove heat stains from wood surfaces, other than sanding of course.
Method 1: Iron and Cloth Method:
- Place a clean, white cloth over the heat stain.
- Set a regular clothes iron to a low heat setting and don't use any steam.
- Gently iron over the cloth in circular motions for a few seconds.
- Lift the cloth and check the stain. Repeat as needed.
- The heat from the iron can help lift the moisture trapped in the wood causing the stain.
Method 2: Sanding and repairing the area:
This can be the best option to remove burn marks from wood, so long as you can sand away the burn mark without creating a large dip in the wood. If the burn is too deep, it might be worth considering your other options such as replacing or repairing the section of wood by cutting, routing or chiseling out a square of wood around the burn and replacing it with a new piece of the same wood.
Method 3: Stain the wood darker:
This method of course will not remove the burn mark from the wood, but instead can help to hide it. You can choose a wood stain that is dark enough to either hide the heat stain or make it blend-in more with the rest of the wood.
- You can also try any of the methods listed for removing older / tougher stains above.

5. How to Remove Sunlight Stains or Light Bleaching from Wood:
To remove sunlight stains or light bleaching from wood, there are a few simple tricks you can try at home:
Method 1: Stain the area with a teabag
A darker tea like black tea or breakfast tea, earl grey or rooibos tea will work best. Preferably use a fresh teabag that is still warm as this will release the most amount of pigment to stain the wood. Dab the teabag on to the wood and leave to absorb into the grain for an hour or so.
Method 2: Stain the area with coffee grounds or instant coffee
This works best for darker wood, you can make a strong cup of black coffee and use a cloth to apply it to the stained area of wood.
Method 3: Stain the wood darker with wood stain
You can always water-down a wood stain if it is water-based to get the shade you would like.
Method 4: Try a walnut or pecan
If the area is small, pecans or walnuts will actually deposit oils onto the wood that will stain and seal it. In fact, walnut oil is often used as a food-safe wood sealant.
Method 5: Blend the stain by lightly sanding the edges.
If you sand the outer edges of the light-bleached area of the wood to blend the contrasting shade of colour between the bleached and not bleached parts it can hide less obvious light stains quite well. Make sure to reseal the area with a wood sealant of your choice after sanding.
Preventing light stains in the future:
- Alternate the placement and orientation of the wooden object relative to where the light is coming from so the same area isn't being constantly exposed to direct light.
- Apply a darker wood stain to protect it from light bleaching.
- Buy a specialised wood sealant intended to protect against UV light/sunlight.
- Make sure to keep an eye on any patches of wood that get a lot of direct sunlight or foot traffic and protect them if necessary.
- Use blinds, furniture or plants to dissipate any direct light from hitting the wood if you cannot move it.

6. How to Remove Scratches, Cracks, Dents & Scuffs On Wood:
For removing scratches, dents, and scuffs from wooden kitchenware without using wood filler, here are some DIY options that you have:
Method 1: Buff with Beeswax, Wood Polish, or Mineral Oil:
- For surface scuffs or light scratches, buff the area with beeswax or a wood polish.
- Apply a small amount to the affected spot and buff with a soft cloth in circular motions until the scratch or scuff diminishes.
Method 2: Steam Treatment:
- For dents in wood, you can try applying steam to the dent using a damp cloth and a hot iron.
- To do this, hold the damp cloth over the dent and carefully apply the hot iron in short intervals to raise the wood fibres.

Method 3: Use a Walnut or Pecan:
- Another simple method is to rub a walnut or pecan directly on the scratched area.
- The natural oils in the walnuts and pecan nuts will transfer onto the rougher surface of the scratch and can actually help reduce the appearance of the scratch or scuff!
Method 4: Try a colour-matching paste:
One that is designed for repairing scratches and dents in wood, apply it according to the manufacturer's instructions and sand down any edges after it's hardened.
Method 6: Use some wood glue:
Mix the wood glue with a little bit of sawdust:
- This is a great solution particularly if the scratch is a deeper and narrower one, and cracked wood.
- Sand a hidden part of the same wood and collect some of the dust (usually a small pinch of sawdust is more than enough).
- Mix it with some all-purpose wood glue or hobby glue and press it into the scratched or cracked area of wood with a flat spatula-like tool. (A butter knife, expired bank card or even a ruler will work just fine if you have no such tool at home!)
- Leave it to dry for at least an hour, or as specified on the glue bottle label.
Method 7: Sand & Repair the Area:
Sometimes a scratch is too deep or obvious on the wood that you might need to first sand it back and then repair it with a wood filler, a resin or by using the sawdust and glue method above. Make sure to also apply some sort of finish to seal the wood after sanding it.

7. How to Remove a Bend or Warp from Wood:
This can happen if you put wood in the dishwasher or leave it soaking for too long, While it might look unfixable at first sight, a wooden board is relatively easy to straighten out again if it has been warped or bent from temperature change and moisture.
- To fix a warped cutting board (or any piece of curved wood), first soak it in warm or hot water for an hour or so. Don't have the water any hotter than your hand can tolerate to not damage the wood.
- Turn the wood over half way through if the top surface is above the water.
- Remove the wooden board from the water and lay it on a flat surface.
- Evenly distribute some weight on top of the wood board and leave it for 24 hours.
- If the wooden object is too large to fit in the sink (or bathtub/shower!) try to soak it with warm water as best you can by wetting the outside surface evenly.

8. How to Sand & Repair a Stain or Scratch on Wood:
If you want to sand the affected section and re-seal/repair the wood. Here's a quick step-by-step guide:
What you’ll need:
- Sandpaper (start with a medium grit, like 120-150 and progress to a finer grit like 220-320)
- Clean, dry cloths (x2)
- A wood oil or finish suitable for the wood type and use case.
- *Optional* Sanding block (anything to wrap the sandpaper around and grip) or an electric sander (optional but recommended for large areas).

- Ensure the wood surface is clean and dry as possible.
- If the stain is on a piece of furniture, consider removing any hardware or parts that could get in the way of sanding.

- Start sanding the stained area using the medium grit sandpaper (120-150) first. Always sand in the direction of the wood grain to avoid creating visible scratches across the wood surface.
- When the stain is mostly removed, use a finer grit (220-320p) sandpaper to get a nice smooth finish and remove any last bits of the stain or scratched area.
- Try to keep the sandpaper flat against the wood surface at all times to make sure that you're sanding the wood evenly.

- After sanding, vacuum up the dust and afterwards wipe down with a damp (but not soaking) cloth. Allow any water to fully dry before proceeding to the next step - this is why you don’t want the cloth to be soaking! ;)

- Apply a small amount of wood oil or finish to the sanded area using a clean cloth or brush, following the manufacturer's instructions. You can also follow our quick step-by-step guide to make your own food-safe natural wood sealant at home.
- Allow the oil to penetrate and dry according to the product's recommended drying time. Usually it will be safe to touch after about an hour, and fully hardened and dried after 12-24 hours. With using any kind of wood finish, less is more, you can always apply several thin coats if needed. Allow to dry for at least an hour between coats.

- Inspect the area once the oil has dried. If the water stain is still visible or if the wood looks uneven, you may need to repeat the sanding and oiling process.

- Once you are satisfied with the appearance of the wood, apply a final coat of wood oil or finish to protect and enhance the surface if needed. This is entirely up to you.

9. Tips For Avoiding Future Stains & Scratches, Cracks and Warps On Wood At Home:
Hopefully this guide has served you well and you now can save your piece of wooden kitchenware, furniture or patch of flooring from any scratches or stains! To avoid any future disasters with your wooden kitchenware, floors and furniture, here are some best practices to follow:
For wood kitchenware like boards, utensils, coasters, plates, trays & bowls:
- It's best to wash them by hand after each use to make sure no stains or damage is caused to the wood.
- Don't leave any wood item soaking in water for anything longer than 30 minutes if possible, otherwise there is a good change it will be warped or could develop cracks over time.
- Avoid putting wooden kitchenware in the dishwasher if you can. If you do, it's best to use the shortest wash cycle with the lowest temperature setting. Lots of steam is made inside dishwashers and steam soaks into wood even faster than water does with the combination of high temperatures it is a recipe for cracked and/or warped wood.
- Decide that some items (like cooking utensils) may just get a little wear and tear on them, and that's ok. You can also make sure the wood is a tough and high quality species like acacia, oak, beech, teak or walnut.
- Make sure the wood maintains it's protection with a food safe sealant.
Tips to avoid stains on wood furniture & flooring
- Clean stains as soon as you notice them.
- Don't leave items that can gather water or moisture underneath (such as plant pots) directly on top of wood surfaces. One way around this is if the pot has space underneath for air to pass through or is turned/moved slightly about twice a week to allow the patch to evaporate.
- Avoid direct heat and light where possible.
- Coasters, furniture felt pads and placemats are your best friends.
- Water, dragging furniture when moving, salt, stones and sand are not.

Conclusion
There you have it! We covered almost every possible kind of stain you can get on wood, be it on your cutting board, bedside table or on your hardwood floors, you now have a full list of hacks and methods to remove and protect against any stains and scratches on wood.
Read more of our guides related to wooden kitchenware & furniture care or shop our growing range of beautiful wood kitchenware, homeware & decor below.
Be sure to save this guide for future reference, you never know when you might need it again! Or, share it with someone you know who would find it useful.
Have any thoughts, or perhaps something we missed? Speak your mind in a comment below, we'd love to hear what you have to say.


Comments (1)
I read to use vaseline on a white stain,which has darkened it ,but know it looks raised what do I do ?