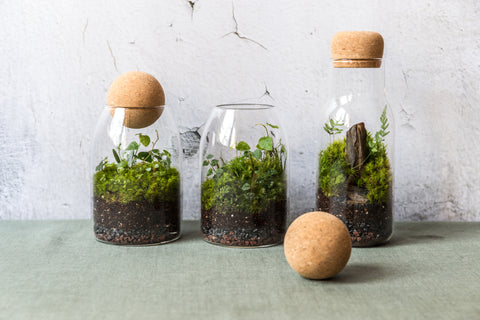
No matter what time of year it is, it's always a great time to make a terrarium. You might be surprised to hear that terrariums are actually incredibly easy to make and require very little maintenance.
One of the easiest and greatest ways to make a terrarium/micro garden is by using a glass jar.
Jar terrariums make wonderful conversation pieces, gifts or rainy-day activities - as well as being relaxing, easy and fun to make.
You'll love watching as they change over time and the best part is that they're simple to make and maintain, just follow this guide and you'll have your very own encapsulated ecosystem that you created!
What You'll Need:
- Glass jar with an air-tight seal - any Wondrwood jars will work!
- Pebbles - for the bottom drainage layer.
- Fine mesh (optional) - to allow water, but not soil, to pass though.
- Soil - use potting compost or fertile soil from your garden.
- Moss (optional) - to cover the soil in-between the plants.
- Plants - the smaller the better, more on plants below.
- Activated carbon/horticultural charcoal (optional) - to prevent odours & bacteria.
- Hardscape (optional) - any rocks, wood & ornaments you want to add.
Before you start, there are essentially two kinds of terrariums you can make:
Do you need to add activated carbon (horticultural charcoal)?
Pro Tip:
You can also make your own charcoal by burning some wood and collecting the charcoal that's left over. Alternatively, you can also use store-bought barbecue charcoal, just make sure that it doesn't have any additives such as oils or other chemicals.
Assembling Your Terrarium Step-By-Step:

Step 1: Add the pebbles first
Cover the bottom with about 1cm of small pebbles, this will allow the water to drain and prevent rot. You can use colourful pebbles if you prefer.

Step 2: Add charcoal or moss
This goes on top of the gravel and prevents odours and toxins from building up. The bottom of the terrarium should be about 3/4 pebbles to 1/4 charcoal or moss. Be sure to wet the charcoal so it doesn't stick to the glass.

Step 3: Add the mesh layer (optional)
Place a layer of mesh (or any non biodegradable material) on top of the charcoal or moss. This will allow water to drain but prevent the soil from falling into the drainage layer.

Step 4: Add the damp soil
Use a 3:1 ratio of soil to pebbles (eg. if you used 1cm of pebbles, add about 3 cm of soil). Make sure the soil is moist but not soaking. Fertile nutrient-rich soil will work best.
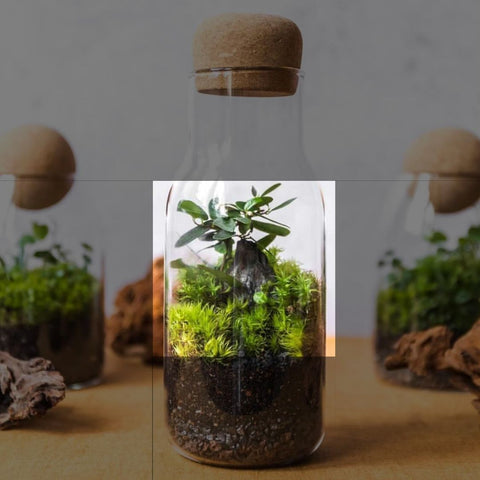
Step 5: Add your hardscape & plants
More on choosing plants below, but in general, choose small plants that will tolerate humid environments. Start off with placing any rocks, wood or ornaments, then add the plants afterwards, starting with the larger ones.

Step 6: Add some moss to fill the gaps
This is also optional, but if you can cover up any remaining surface soil with moss it will make it look a lot less 'constructed' and appear more natural. Finally, don't forget to add some water!
Choosing The Right Plants:

Humid-Tolerant Plants
Any plant classified as 'tropical' or tolerant of humid/damp environments are ideal.

Not Too Much Light
You'll need to keep your terrarium in indirect light, so avoid plants that require full direct sunlight.
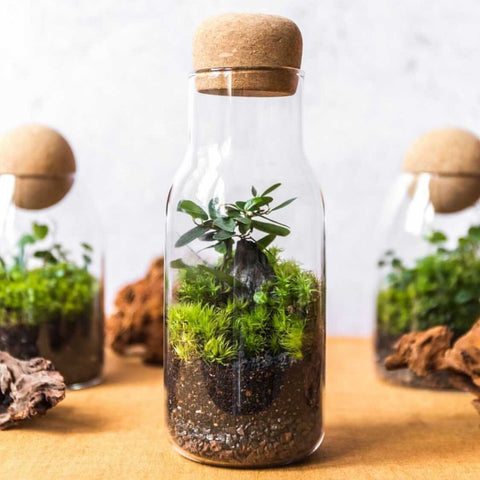
Small & Slow Growers
Your jar terrarium has limited space, so be sure to get plants that are small and won't outgrow your jar.
Can you make a terrarium with cacti or succulents?
Pro Tip:
Be sure to also add more soil and pebbles in your jar if you choose to keep cacti or succulents in them. This will ensure that the plant is higher up in the jar and will be able to get enough air circulation, particularly if it's in direct sunlight.

Open Vs Closed Terrariums:
Caring For Your Terrarium:
1. Keep the soil damp
If it's a closed terrarium, any water you add at the start will remain inside the jar and continue to evaporate, condense and 'rain' down again - just as it does in nature. Keep an eye on the soil and if it appears to be drying out, add a little more water.

2. Allow air to circulate
Occasionally you can open the lid to allow some fresh air inside the jar. Especially if too much condensation builds up on the glass. Some condensation is perfectly fine, but you don't want it to be water logged.

3. Trim dead leaves
If you see some parts of the plant beginning to turn yellowish-brown and die off, trim those parts with a scissors.
4. Don't fertilise it
It's important to use good soil in your terrarium, but it won't need any additional fertilisers. provided there is a good layer of soil in there, it will flourish for many years to come.

5. Keep out of harsh light
Don't put your jar terrarium in direct sunlight as this will cause it to become a hot condensation-filled fungal farm! Keep your jar in a position where it will get indirect light.
6. Don't over-water it
If you see lots of condensation and signs of water logging around the pebbles at the bottom, it's got too much water. Always start off with less water than you think and add more if things look too dry.
Ready, Set...Nature!
Are you ready to make your own terrarium in Wondrwood jars? If you don't already have some, you'll need to get yourself some jars!
All of our glass jars are fitted with air-tight seals and are ideal for all kinds of uses, including terrariums. The rest is up to you, all that's left is to pick your favourite jars and start creating!




Comments (10)
Very informative! Thanks so much!
Can I use cardboard in place of moss
Thank you so much! I am making my first terrarium and this was extremely helpful! Information was organized in a user friendly manner and to the point!
The info in your article was very helpful, thankyou
Do we keep roots on plants
Do we keep roots on plants
This was very helpful! Thank you so much!
Thank you for the tips it looks so cute!💕
Thank you, I have been wanting to build a terrarium in a gar for soooo long!
With love: Paula
Thank you, I have been wanting to build a terrarium in a gar for soooo long!
With love: Paula